I was so busy frantically sewing all things before my trip to Bath that I had no time to write about the new things I made. I don't think I've ever been that last minute with sewing before. Of course, I have a fairly substantial Regency wardrobe already, but you know, it was nice to have something new too, and it was Bath, after all, so you'd wanted to be fashionable...
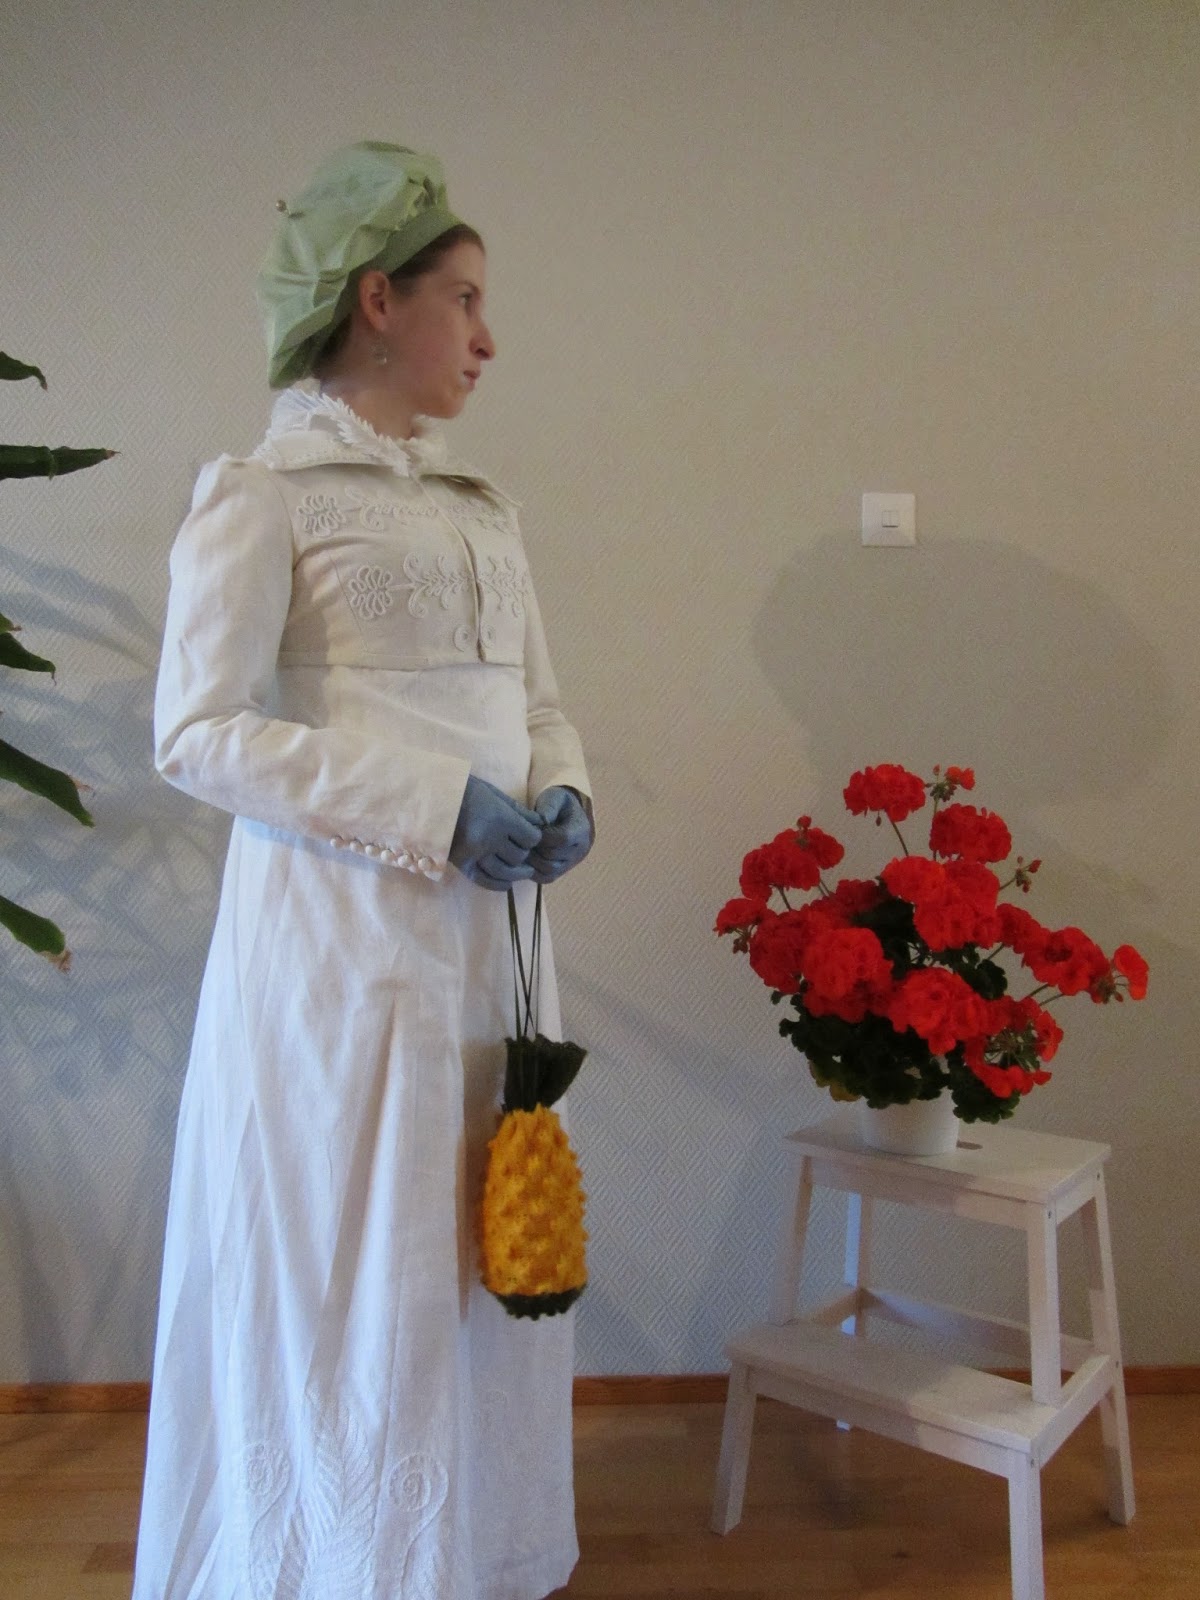
Ergo, two new spencers (I swear I didn't plan them, they just happened!), a turban hat (because apparently any hat with a brim just makes me look idiotic) and a new block printed day gown.
Let's start with the gown. I've made one block printed gown before, but I wanted a long-sleeved day dress, and something dark with white print. The gown is a slightly improved version of my earlier drop-front dress; I think the original pattern came from Jean Hunnisett's book. I cut the pattern pieces out first, then printed them with my Indian block prints, using white fabric paint. As before, I printed the bodice pieces, the sleeves and one hem piece over one weekend and then procrastinated about a week before taking up the other hem piece. The fabric is blue cotton and I lined the bodice with black batiste.
The spencers were a stash/budget project. I originally wanted to have a bright red spencer to wear with the blue dress, but I couldn't find fabric. Then I got the idea to visit some flea markets and look for 2nd hand jackets in suitable colour and fabric that I could take apart and remake as spencers. I didn't find anything in red, but I did score a rather ugly, if good quality, white linen-silk blend jacket (under 10€ to boot!) that I completely ripped apart and cut again using my trusty spencer pattern. Luckily the sleeves worked as they were, since I would not have had enough fabric for new sleeves. I added three more buttonholes on each cuff and made funny fabric buttons for them. The spencer is trimmed with lucet braid I made myself using cotton yarn. The inspiration for the trimmings of this spencer came from this extant piece in the Met Museum Collections; I took the initial idea and sort of ran with it. :)
The second spencer is a stash project; I've had the yellow velvet for years and I've tried to make things out of it several times (a chair cover, an 18th century pierrot, a knee-length Regency pelisse) but none of the previous attempts really worked that well. This time the spencer seemed to be the right choice and I managed to put together a nice little jacket, even if I say so myself. I was able to recycle the bodice from the doomed pelisse project and I also managed to fix the earlier bothersome sleeves by adding a gore to the sleeve cap end of the seam. The sleeves were originally a remnant from my early attempts in historical costume, when I didn't realise that different time periods had different styles in sleeves and their patterns. Oh well. At least I fixed it and was able to use those sleeves for something, finally! I made a wide collar for the spencer and trimmed the whole thing with cream pompom trim, because I wanted something fun and a little whimsical to decorate the jacket. Also, as time was scarce, I abandoned my original idea of hussar style soutache trim.
After looking at tons of fashion plates and despairing over the fact that any brimmed hat, especially bonnets, look stupid on my head I made the turban hat after the instructions of Festive Attyre. It was the nicest project; it's not often in this line of hobby that you have clear instructions of what to do, so making this hat was very relaxing in the middle of all the sewing madness.
I didn't actually wear the yellow things at all while I was in Bath; I have no idea why. I kept liking the white spencer and anyway, I might have to adjust the yellow spencer a little; in the general haste of trying to get everything done I may have made it the teensiest bit too small as there's an annoying gap at the centre front.
I did take some photos of the new things and my other Regency clothes, want to see? :)
Näytetään tekstit, joissa on tunniste block printing. Näytä kaikki tekstit
perjantai 26. syyskuuta 2014
tiistai 21. tammikuuta 2014
Red and white block printed gown
It's nice to have a new dress. This particular dress has been on my to-do list for a long time, ever since I bought those Indian block prints and long before that really. The reason I haven't got around making it until now has been, as ever, the lack of the right fabric. Anyway, I found nice white cotton voile around the New Year and was really chuffed to bits. Finally!
The "little white dress" is certainly the ubiquitous Regency fashion
item, but the patterned print fabric dresses were equally popular, in all available colours. I'm not well read enough on the topic to write about it at lenght, but there's plenty of information on the subject to be found in the net.
The dress pattern came from Janet Arnold's book, and it's the same I used for my very first Regency dress, the white fern dress. I always liked that pattern and it worked well, so why not use it. I cut the pieces and then set out printing them. I used the narrow border print on the neck edge, the cuffs, the "belt" piece and the hem. For the hem I also used the big paisley prints to create a wide border. The rest of the dress is printed with the little flower motif. I measured the hem border very carefully, to make the both hem pieces match when I sewed them together. I was a bit less meticulous with the flower motif, and didn't measure and mark the placements. It shows, if you examine the dress really closely, but not so much as to really bother me. I'm already planning to print fabric for another project, so maybe I'll be more careful next time.
Now, then. Enough with this, here are some pictures.
| The neck-edge and the belt pieces |
| Sleeve |
| The dress hem |
| It was surprisingly hard to print both the hem pieces. It didn't really take that long, but after finishing the first piece, I procrastinated for a week before starting on the second piece. |
| I like the back and the pretty pleats |
| Well, it's winter, after all, so the Shetland lace shawl came in handy here. |
| The colour looks pink but it's actually red. I swear I'm not doing this on purpose... :) |
| I made this 1790s-1800 spencer in early January 2013 |
| The dress with the long-sleeved frilly chemisette |
| The dress closes with 3 dorset buttons and there's a ribbon running through the belt channel underbust that ties at the back, to secure the fit of the bodice. |
| Looks fab with this spencer, too. |
torstai 21. marraskuuta 2013
I'm not dead!
I've only been busy with studying and stuff. I have nothing to post about yet, but I'm soon hoping to finish the petticoat and caraco combination I'm making out of the other saree I bought. The saree was a vintage one, like the yellow saree, and the colour is strong reddish orange. The saree is embroidered in the traditional kantha style and I think it sort of works for 18th century styles. I'm not sure what the fabric is exactly but I would guess silk blend. But no pictures until I've finished it!
Instead, here's a couple of photos of a shawl I spruced up with block printing. The shawl is cotton, a flea market find and I hand printed the motifs with my lovely Indian block prints. So, a paisley shawl on a budget, one might say :)
tiistai 21. toukokuuta 2013
Block printing
So, I've been slaving away with the pelisse trimmings and have almost finished the left side. Still some beading to do (found more beads in the shop, hooray!) and then I can move on to the right side. After that it's just finishing, sewing on the collar, and attaching the bodice lining, the front edge facings and the hooks and eyes. Can't believe it's nearly done!
My block print stamps that I ordered a couple of weeks ago came yesterday! They're so pretty!
I dyed the flannel and I really like the result: the colourway was supposed to be Tulip Red, but it's more like very vibrant fuchsia. Today I printed it with my new stamps and the fabric looks great! The paint I used is Panduro Palett, colour yellow for dark fabrics (they have two lines, for light and dark fabrics). I just dabbed the paint on the stamps with some superlon and printed away. The trick is to have enough paint on the stamp, even what would look like too much. At least that worked for the flannel.
I still need to do some more printing because I only did half of the fabric. It was surprisingly fast work and fun, too. Can't wait to print a gown fabric with the stamps!
My block print stamps that I ordered a couple of weeks ago came yesterday! They're so pretty!
| I ordered the three big stamps, the little flower stamp was an additional present :) |
I dyed the flannel and I really like the result: the colourway was supposed to be Tulip Red, but it's more like very vibrant fuchsia. Today I printed it with my new stamps and the fabric looks great! The paint I used is Panduro Palett, colour yellow for dark fabrics (they have two lines, for light and dark fabrics). I just dabbed the paint on the stamps with some superlon and printed away. The trick is to have enough paint on the stamp, even what would look like too much. At least that worked for the flannel.
I still need to do some more printing because I only did half of the fabric. It was surprisingly fast work and fun, too. Can't wait to print a gown fabric with the stamps!
Tilaa:
Blogitekstit (Atom)